Surgical Education
The videos were created by TVASurg (Toronto Video Atlas of Surgery)
Click an image to watch the associated video
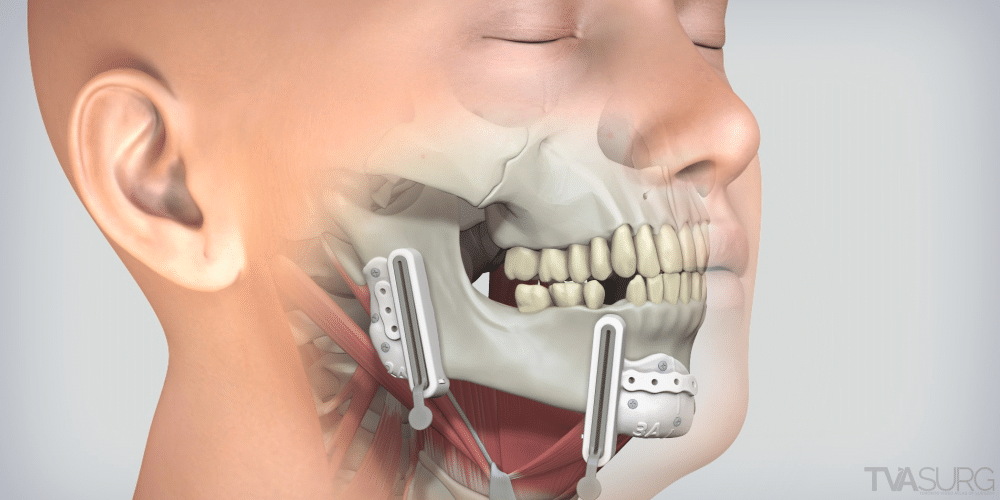
Virtual Surgical Planning (VSP) and JAW IN A DAY (JIAD) for Mandibular Reconstruction
00:05 Surgical planning
03:36 Exposure
04:01 Resection
06:13 Flap harvest
07:44 Mandible Reconstruction
08:21 Vascular Reconstructions
09:37 Dental Reconstruction
11:38 Soft Tissue Reconstruction
- Patient Selection Disclaimer: Highly selective approach for low-risk patients without high volume disease – ideal for benign cases, secondary reconstructive cases, and very limited oncologic cases.
- The Jaw-In-A-Day (JIAD) mandible resection with immediate dental implant placement and prosthetic restoration, is a single-stage reconstructive procedure that combines resection, reconstruction using a free flap, dental implant placement, and temporary prosthetic restoration all in one operation.
- Virtual Surgical Planning (VSP) for mandibular reconstruction enables precise preoperative planning with the use of prefabricated, patient-specific cutting guides and titanium plates. Key benefits include:
- improved operative efficiency,
- decreased OR time,
- and optimized occlusion accuracy.
- In this case, the neck dissection was performed for oncological reasons.
-
Skin paddle position is based off the preoperative perforator location which is measured from CT angiogram. The cutting guide would then be positioned accordingly.
-
The fibula cutting guide may not fit as well as its shifted proximally, because the fibula shape changes.
-
If implants are to be placed down at the leg, implant placement can also be performed prior to the proximal and distal osteotomies as this provides a longer fibula to hold on to.
-
Once the osteotomies are performed, the mandibular plate can be secured to the fibula down at the leg, and tried on an ablative guide to ensure it matches prior to transfer.
-
When the fibula is secured to the native mandible, a prefabricated occlusal guide can be used to maintain intercuspal position (ICP) as the screws are fastened, and this will maintain the patient’s occlusion prior to tightening.
- Proper implant angulation is essential for successful prosthetic restoration in JIAD procedures, as Buccal canting (implants angled toward the cheek) creates significant complications.
-
When doing mandible reconstruction, fixating the proximal, posterior segment first allows for accurate seating of the mandibular condyle prior to fixating the distal, anterior segment to achieve an ideal occlusion of the native dentition at the time of rigid fixation.
- If there is extensive buccal and floor-mouth component in the soft tissue defect, these can be challenging to immediately prosthetically restore. Considerations include:
- immediate bury of the implants, or,
- bring out two separate skin paddles where implants come out between 2 skin paddles, but this does increase the case complexity.
- Dental implants can be placed with fibula, but, need VSP model to confirm appropriate location.
- If dental implants are placed in the oral cavity, an occlusal guide will need to be used.
- In the case presented here, the implants are brought out at the interface of the skin paddle and floor-mouth mucosa to avoid post-op infection (peri-implantitis).
-
A temporary prosthesis was placed out of occlusal function to avoid unnecessary loading of the implants, but the permanent prosthetic will provide adequate occlusion.
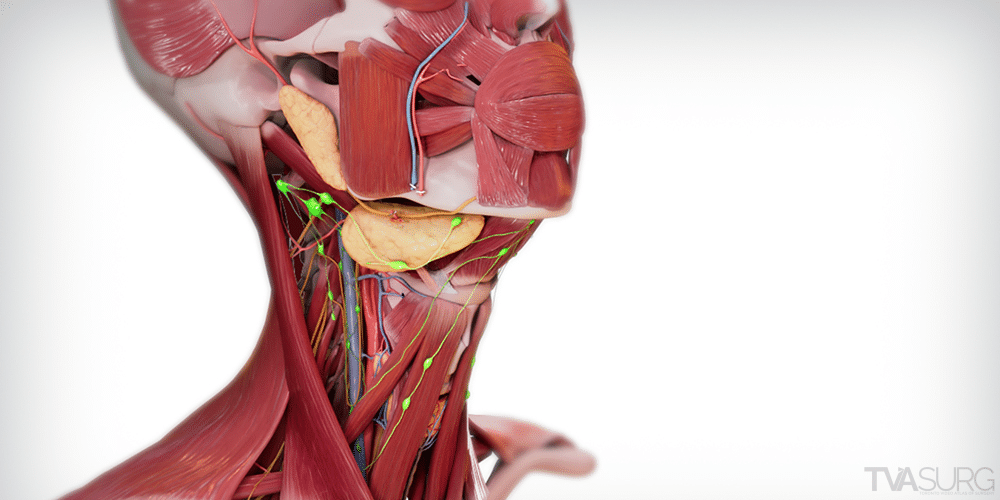
Supraomohyoid Levels 1-4 Neck Dissection
00:05 Surgical planning
05:35 Exposure
05:56 Level I midline dissection
08:32 Level II lateral dissection
10:52 Level III lateral dissection
12:43 Resection
- The patient is placed in the supine position with a shoulder roll placed to provide neck extension.
- For this case, a tracheostomy was done to facilitate airway support for a major ablative head neck procedure.
- Frequently encountered is an occipital artery that “hooks” hypoglossal nerve, and pulls it inferiorly in the neck. If present, the artery will be ligated and divided.
- While the SAN travels posterior to the IJV most frequently, it can also travel anteriorly to it, and in the cases of a bifid jugular vein, through it.
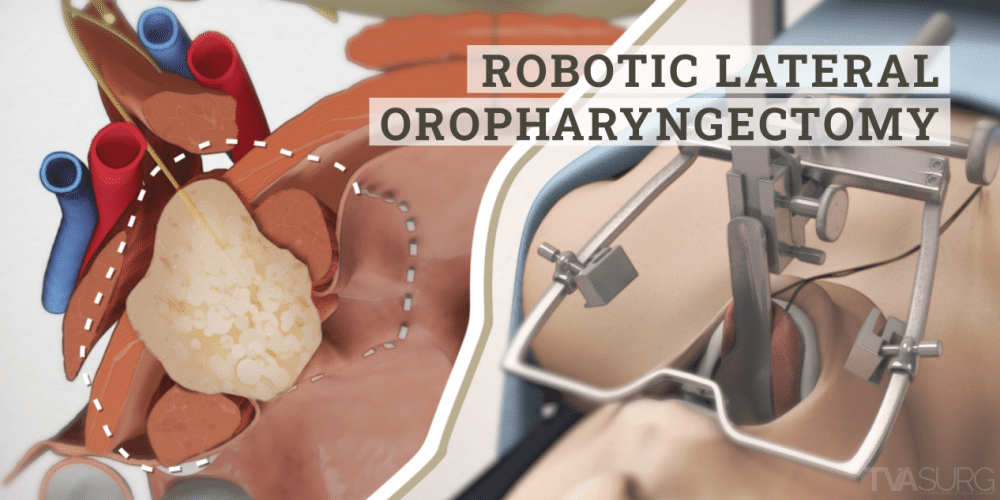
Robotic Lateral Oropharyngectomy
TORS radical tonsillectomy
00:09 Surgical overview
02:15 Introduction to mouth retractors
03:11 Placement & suspension of mouth retractors
04:17 Docking & port placement of robotic system
05:30 Resection of tonsil cancer
- The patient is 63-years-old male with squamous cell carcinoma of the oropharynx. The endophytic tumour is in the left tonsillar fossa extending towards the junction of the tongue base.
- A transoral robotic radical tonsillectomy is performed.
- An FK-WO TORS retractor frame is used for optimal transoral exposure.
- The Da Vinci multi-port Si and Xi, or single-port SP robotic surgical system can be used depending on institutional availability.
- The Da Vinci Si is 45 degrees to the edge of the bed, where the Xi will be positioned perpendicular to the bed.
- The tumour will be removed along with the palatoglossus, the palatopharyngeus, and the superior pharyngeal constrictor muscle.
- Depending on the depth of the tumour, portion of the styloglossus, and stylo pharyngeus muscle, and the distal glossopharyngeal nerve can be resected.
- Routine neck dissection and ligation of external carotid artery branches will be performed to minimize post-operative bleeding. The lingual artery and other branches are routinely ligated.
Scapula Flap Harvest
with TDA pedicle and latissimus dorsi muscle flap
00:05 Surgical planning
04:45 Exposure
05:32 Dissection
07:25 Divisions
09:51 Flap harvest
- Patient is positioned supine with the arm extended and turned 15 degrees away from the planned harvest site.
- An incision is made 2 cm from the superior limit of the posterior axillary fold, to 5 cm below the tip of the scapula, at the anterior border of the latissimus dorsi muscle.
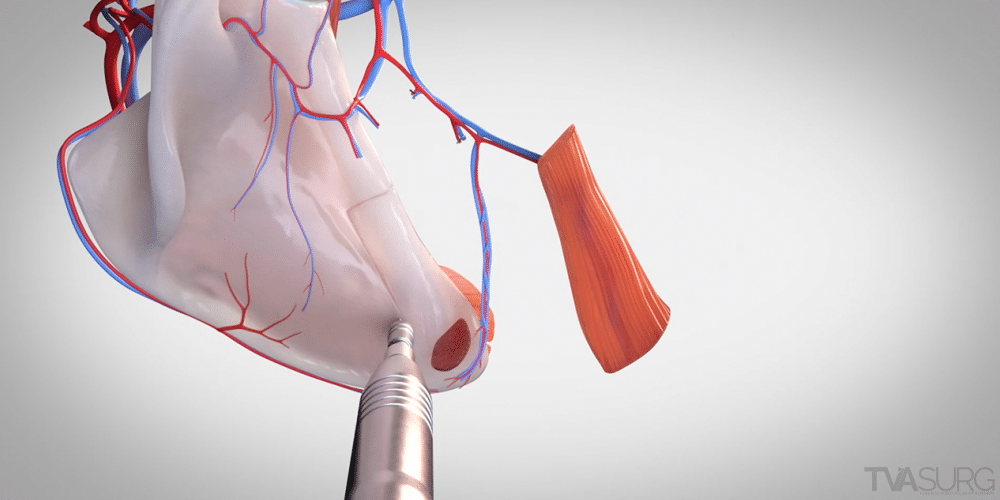
- Up to 10 centimeters of bone can be taken for the flap, for this case, 7 centimeters of the scapula tip will be harvested.
- A 10 cm length of vascular pedicle will be taken including the angular branch of the TDA and its venae comitantes.
- Depending on the needs of the reconstruction, a 12×8 cm TDAP skin flap may be taken, and/or a latissimus dorsi muscle flap.
- The pedicle is dissected retrograde to reveal the blood supply to the scapula tip via the angular branch, and the serratus anterior branch of the TDA.
- The angular branch and its venae comitantes are identified usually on the anterior border of the scapula about 6-8 centimeters proximal to the tip of the scapula.
- The serratus anterior muscle is detached from the medial border of the scapula over the length of the bone harvest, with great care taken not to injure the vascular pedicle.
- Teres major will be detached from the lateral surface of the scapula if there is to be a mandible reconstruction.
- The subscapularis muscle is detached sharply to completely mobilize the bone flap.
Cricotracheal Resection
for subglottic tracheal stenosis
00:13 Surgical planning
03:18 Patient position
03:42 Exposure and dissection
06:39 Cricotracheal resection
10:43 Reconstruction
- Patient diagnosed with subglottic tracheal stenosis, a condition that restricts the airway and makes respiration difficult.
- A cricotracheal resection procedure will be performed to remove the stenotic portion.
- Care is taken to avoid the recurrent laryngeal nerve throughout the procedure.
- The airway is opened by cutting directly into the stenosis, minimizing the amount of trachea to be resected.
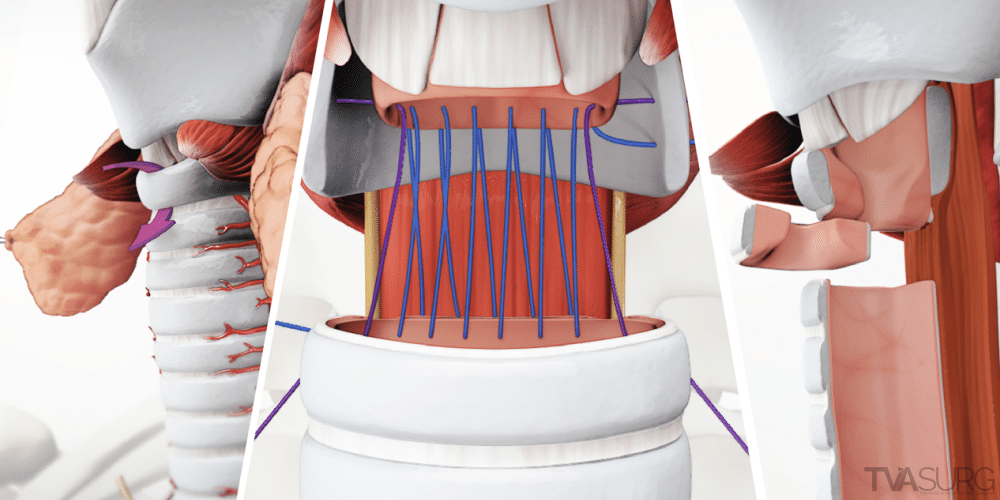
- On the distal end of the divided trachea, the stenotic portion is removed, and stay sutures are placed on both sides, at the junction of the membranous and cartilaginous portion.
- On the proximal end, the anterior third of the cricoid cartilage is resected, followed by removing the stenotic portion of the trachea. The posterior wall of the cricoid cartilage is thinned down to ~40% of its thickness.
- The stay sutures from the distal trachea are placed on the proximal portion, through the mucosa and cricoid cartilage.
- The posterior wall anastomosis is performed with a running suture.
- It is critical that the stay sutures are tensioned prior to tensioning the posterior wall anastomosis. This prevents the delicate membranous tracheal tissue.
- The edges of the trachea are approximated, followed by the tightening of the posterior wall anastomosis.
- Interrupted sutures are placed for the anterior wall anastomosis, and a T-tube is placed for support.
- The upper limb of the T-tube should be positioned just above the vocal cords.
- A tracheotomy is made in the distal trachea for the T-tube side arm.
Anterolateral Thigh Perforator Flap Harvest
Subfascial harvesting technique
00:10 Surgical planning
03:55 Exposure
06:11 Perforator dissection
08:28 Descending branch dissection
11:53 Harvest & Closure
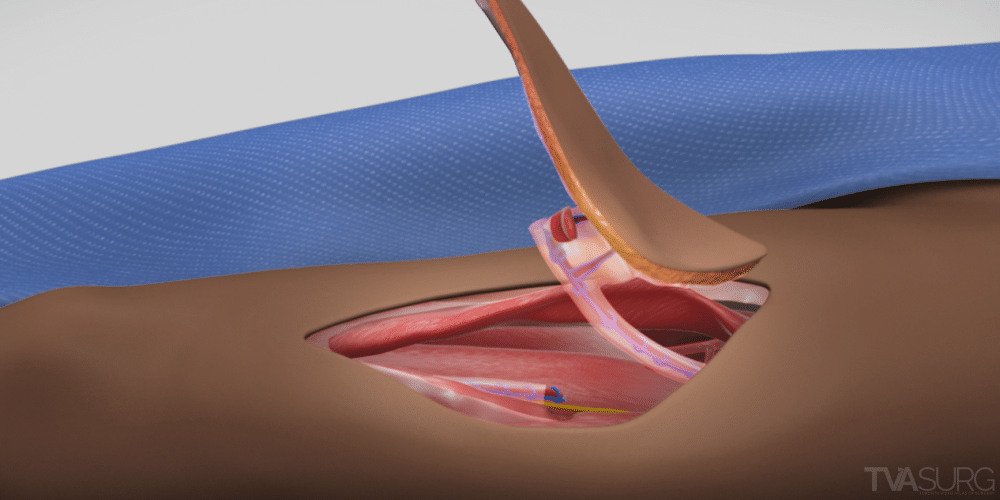
- The anterolateral thigh flap involves the skin paddle, the descending branch pedicle of the lateral circumflex femoral artery, and the perforators to the skin paddle.
- The descending branch pedicle is situated between the rectus femoris and vastus lateralis muscle.
- The major perforators to the skin paddle are normally located within a 2 to 3 cm radius from the midpoint between the anterior superior iliac spine and lateral border of the patella.
- In this unique case, both myocutaneous and septocutaneous perforators are present. More commonly, only a myocutaneous perforator is found, which traverses the medial edge of the vastus lateralis muscle.
- The vastus lateralis muscle is dissected to free the myocutaneous perforator. A small muscle cuff is left beneath the perforator to identify the orientation and prevent twisting and injury to the perforator.
- The pedicle is divided distal to the perforators. On the proximal end, the pedicle is divided distal to the branch to the rectus femoris muscle, preserving the blood supply to this muscle.
- The subfascial harvesting technique dissecting the plane below the fascia lata, taking the fascia with the flap. The fascia is carefully transected to maintain a safe distance of 2 to 3 cm to the perforators.
- Care is taken to spare the motor branch of the femoral nerve to the vastus lateralis muscle during dissection.
Thoracodorsal Artery Perforator Flap Harvest
for head and neck reconstruction procedures
00:10 Surgical planning
03:31 Pre-operative surface markings
04:21 Locating the perforator
05:45 Dissection of the thoracodorsal pedicle
07:22 Intramuscular dissection of the descending branch
09:15 Flap raising and closure
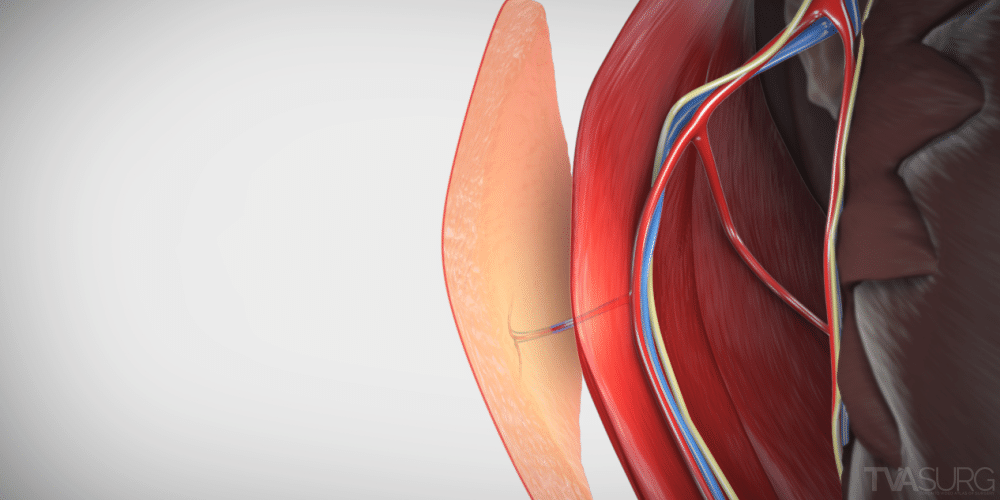
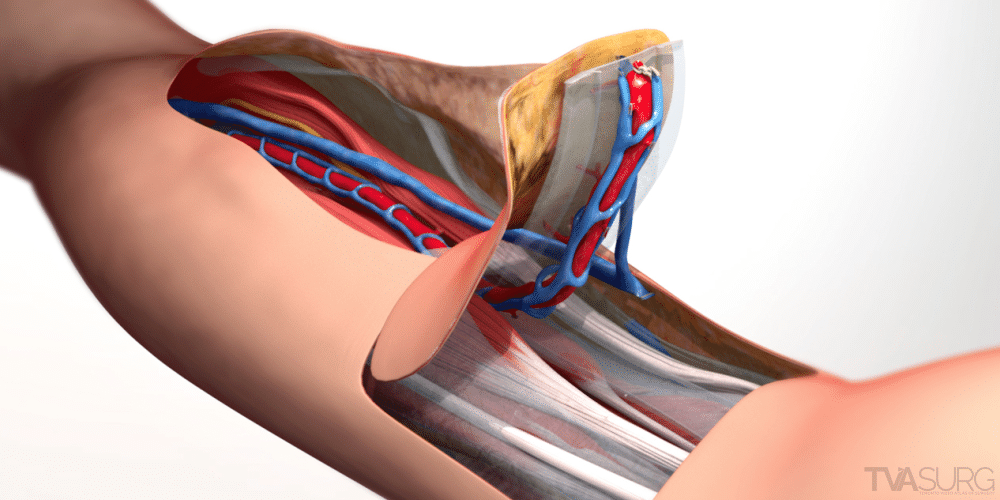
- The skin island lies atop the latissimus dorsi muscle, and is supplied by a myocutaneous perforator, arising from the descending branch of the thoracodorsal pedicle.
- The anterior margin of the latissimus dorsi is palpated and marked on the skin surface.
- The perforator is most likely to be found at the two-thirds mark of the muscle border, distal to the axilla.
- During dissection of the muscle, care is taken to identify the axis of the anterior border; this guides subsequent dissection away from the perforator, which is found on the lateral surface of the muscle.
- Skin is carefully dissected away from the lateral surface to identify the perforator, which is usually found within 2cm from the anterior border of the muscle.
- After identifying the perforator, the latissimus dorsi is dissected away from the serratus anterior muscle.
- The serratus branch is identified on the serratus anterior muscle; the descending branch and medial branch are identified on the deep surface of the latissimus dorsi muscle.
- The nerve to latissimus dorsi is identified along the descending branch, and is followed proximally towards the axilla, mobilizing the thoracodorsal pedicle.
- The perforator is followed through the muscle tissue to the descending branch, dividing the overlaying muscle tissue atop the perforator.
- The medial branch, along with the serratus branch are divided between clips.
- The posterior border of the skin island is marked, and traced with electrocautery.
- The skin flap is carefully dissected away from the latissimus dorsi muscle, leaving a safe margin around the perforator.
- The descending branch is divided between clips, distal to the perforator.
- A small cuff of muscle tissue is left on the perforator, for protection as well as acting as an indicator for vessel rotation.
- The pedicle is lifted from the underlying muscle tissue, and divided between clips at the proximal end near the axilla.
Fibula Osteocutaneous Flap Harvest
for head and neck reconstruction procedures
00:13 Surgical planning
02:55 Exposure & flap marking
05:26 Mobilize flap
07:49 Osteotomies
08:59 Distal pedicle
09:24 Flap raising
11:28 Proximal pedicle
12:23 Flap harvest
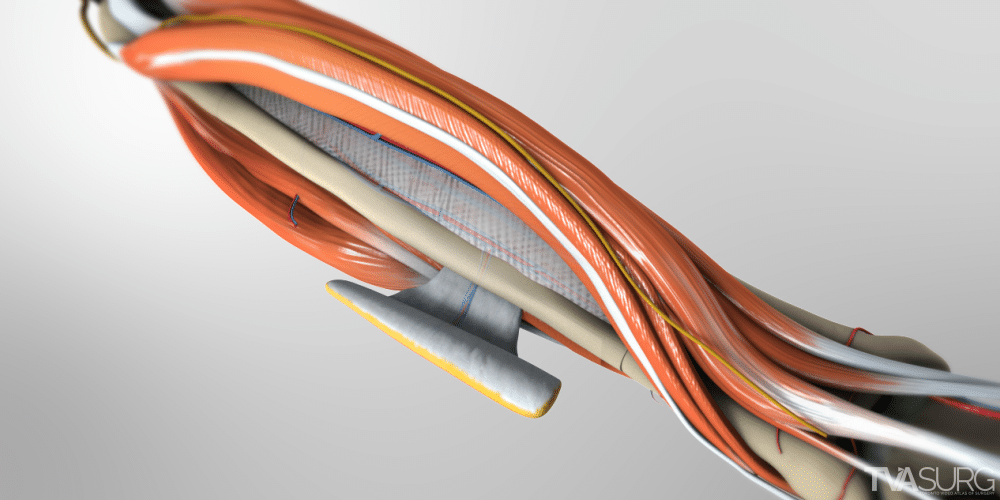
- Osteotomies will be performed 6 cm from the head of the fibula superiorly, to 6 cm from the lateral malleolus of the ankle inferiorly.
- Right-angle dissectors should be inserted posterior to the fibula to protect the vascular pedicle during distal and proximal osteotomy.
- Up to 18 cm of bone is available for the osteocutaneous flap, for this case, 10 cm will be harvested, as well as a 3 cm by 5 cm skin paddle island, and a 10 cm length of vascular pedicle, including the peroneal artery and 2 vena comitantes.
- The vascular pedicle is released from the fibula after completing the harvest to provide pedicle length for microvascular anastomosis in the neck.
- In this case, the septum containing the perforators to the skin was released from the fibula to allow rotation of the skin island, if this degree of mobilization is not required the septum can be left intact to prevent tethering or injury of the perforator to the skin island.
- In this video the final dissection and separation of the proximal artery and venae comitantes of the vascular pedicle are performed while the tourniquet is inflated. This approach is appropriate for experienced flap surgeons. For less experienced surgeons, proximal peroneal pedicle dissection and mobilization should be done after the tourniquet is deflated, in order to prevent prolonged ischemia times should the pedicle be injured during this dissection.
- Patients with significant varices in the leg may have very large medial perforating veins making dissection technically difficult and tedious. The use of an Esmarch bandage to exsanguinate the leg prior to tourniquet inflation can assist with technical difficulty of this dissection.